Table of Contents
- 1) Introduction
- 2) Project Overview: Library
- 3) Step 1 — Creating a New Addon Module
- 3.1) What is an Addon Module, Addons Directory and Addons Path?
- 3.2) Preparing the Addons Path
- 3.3) Create the Module Skeleton
- 3.4) The __init__.py Chain
- 3.5) Creating the Manifest File
- 3.6) Understanding depends
- 3.7) Understanding data File Load Order
- 3.8) Manifest Key Reference
- 3.9) Setting the Module Category
- 3.10) Choosing a License
- 3.11) Adding a Description and Icon
- 3.12) Installing a Module
- 3.13) Upgrading Modules
- 4) Step 2 — Creating a New Application
- 5) Step 3 — Adding Automated Tests
- 6) Step 4 — Implementing the Model Layer
- 7) Step 5 — Setting Up Access Security
- 8) Step 6 — Implementing the Backend View Layer
- 8.1) Creating a Form View
- 8.2) Form Structure — header and sheet
- 8.3) Two-Column Layout with Nested group
- 8.4) Conditional Attributes — attrs Removed in v19
- 8.5) Adding a List View
- 8.6) Adding a Search View
- 8.7) The context Attribute on Filters
- 8.8) How field Behaves Differently in a Search View
- 8.9) Adding Menu Items and Window Actions
- 8.10) Button Styling
- 9) Step 7 — Implementing the Business Logic Layer
- 10) Step 8 — Implementing the Website UI
- 11) Exercise — Add a "Number of Pages" Field
- 12) Summary
1) Introduction
Developing in Odoo usually means creating our own modules. In this chapter, the goal is to create a first Odoo application from scratch, learn the steps needed to make it available to Odoo, install it, and iteratively build it up. Odoo follows a Model-View-Controller (MVC)-like architecture.

MVC is an architectural pattern that separates an application into three distinct layers:
| Layer | Responsibility | In Odoo |
|---|---|---|
| Model | Data and business logic — defines what the application knows and how the data behaves | Python classes (models.Model) — fields, constrains, compute methods, ORM |
| View | Presentation — defines how the user sees the data | XML definitions — form, list, search, kanban views + QWeb templates for the website |
| Controller | Entry point — receives user requests and coordinates Model and View | URL routes (Python @http.route controllers) + window action records in XML |
The key benefit: a change in one layer has minimal impact on the other two. For example, you can redesign a form view without touching the Python model.
The chapter walks through each of those layers one by one. The topics covered are:
- Project overview: Library
- 3) Creating a new addon module
- 4) Creating a new application
- 5) Adding automated tests
- 6) Implementing the model layer
- 7) Setting up access security
- 8) Implementing the backend view layer
- 9) Implementing the business logic layer
- 10) Implementing the website UI
1.1) What we did up to now
Before diving into Odoo module development, let us recap what you have already accomplished in the previous tutorials:
- Created a GitHub repository (
komiti_library) with two branches:main(production) andstaging(integration). - Learned the Git workflow: feature branches, committing, pushing, promoting to
stagingandmain. - Set up two Docker Compose stacks on Docker Desktop — a dev instance (port
8067, databasekomiti_library_dev) and a prod instance (port8068, databasekomiti_library_prod) — each running Odoo 19 with its own PostgreSQL database.
Your local environment is ready. Both Odoo instances are running and accessible in the browser. From this point on, you will be writing code that runs inside those containers.
1.2) What you have to know before starting the non-GUI Odoo development journey
Odoo can be customised in two ways:
- GUI customisation — building directly in the browser without writing code:
- Odoo Studio — a paid drag-and-drop tool (Enterprise edition only) that lets you add fields, change views, and create simple automations. Studio is not covered in this onboarding course.
- Developer mode with Technical menus — available in all Odoo editions. By enabling developer mode (sometimes called debug mode) you unlock the Settings → Technical menu, which lets you create fields, views, actions, and automated rules directly in the UI. Most of what Studio can build, these menus can build too — albeit in a more technical way that is not as easy for non-developers.
- Non-GUI (code) development — writing Python models, XML views, and JavaScript components. This is what the rest of this tutorial covers.
Even when developing through code, you will often need to inspect what Odoo is doing under the hood. For that, you need developer mode.
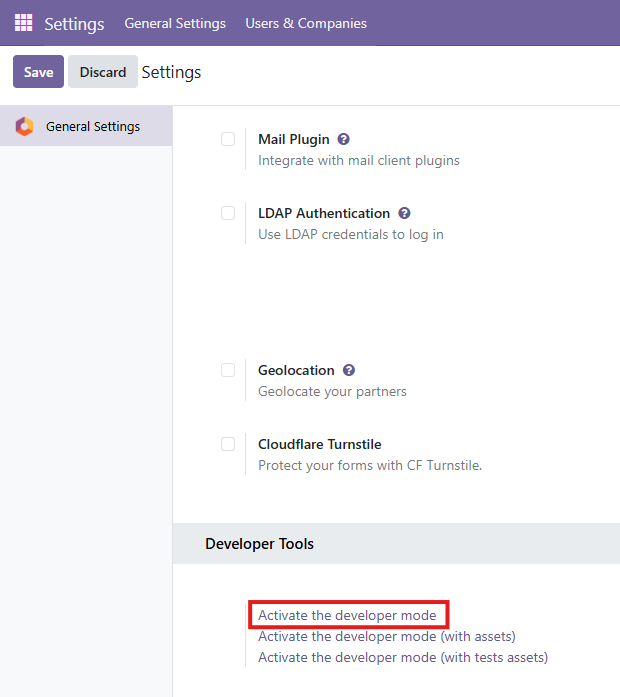
Enabling the developer mode
Developer mode unlocks extra menus, technical information on fields, and debugging tools. To activate it:
- Log in to your Odoo dev instance (
http://localhost:8067). - Go to Settings → General Settings.
- Scroll down to the Developer Tools section.
- Click Activate the developer mode.
Once activated, you will notice extra technical menus (e.g. Settings → Technical) and additional debug information throughout the interface. You can also append ?debug=1 to any Odoo URL to enable it directly.
2) Project Overview: Library
The learning project for this chapter is a Library application — specifically a book catalog. The catalog allows keeping records of books in the library with their relevant details, and makes that catalog available through a public website where available books can be seen.
The book data requirements are:
- Title
- Authors
- Publishing company
- Date published
- Cover image
- ISBN (with check digit validation)
- Active flag (indicating books publicly visible on the website)
Following the pattern used by standard Odoo base apps, the Library app has two user groups: Library User and Library Manager. The User level performs all daily operations; the Manager level additionally manages configurations. For the book catalog specifically:
- Library Managers can edit books.
- Library Users and Public website visitors can only view books.
3) Step 1 Creating a New Addon Module
3.1) What is an Addon Module, Addons Directory and Addons Path?
- An addon module is a directory containing an Odoo manifest file providing features, such as a new app or additional features for an existing app.
- An addons directory contains several addon modules.
- An addons path is an Odoo configuration, with a list of directories where the Odoo server will look for available addons.
Some addon modules are featured as apps. Apps are top-level modules for a feature area in Odoo, shown in the top-level Apps menu (e.g., CRM, Project, HR). A non-app addon is expected to depend on an existing app and extend it. The distinction is:
- if the module adds major new functionality ⇒ it should be an app;
- if it modifies an existing app ⇒ it should be a regular addon module.
To develop a new module, you:
- Ensure the working directory is in the Odoo server addons path.
- Create the module directory containing the manifest file.
- Choose a license if you intend to distribute it.
- Add a description.
- Optionally, add an icon.
3.2) Preparing the Addons Path
The addons path is an Odoo configuration listing directories where the server looks for available addons. By default it contains Odoo's own bundled apps and base module. You extend it by adding directories for custom or community modules.
Before you begin — verify your runtime is up
Runtime is everything that needs to be running for Odoo to work: the Odoo server process, the PostgreSQL database, and the configuration that connects them. The commands in this section run inside the Odoo container. Before you can execute them, your entire runtime must be up. Work through this checklist:
- Docker Desktop is running. Open Docker Desktop and confirm the engine status is Running (green icon in the system tray). If it is not running, start it and wait until it is ready.
- Open a terminal. In VS Code, use the menu View → Terminal (or the shortcut Ctrl+`). This opens an integrated PowerShell terminal at the bottom of the editor. If you prefer a standalone window, press Win+R, type
powershell, and press Enter. - Navigate to your dev stack directory.
cd C:\dev\KomITi\komiti_library\infra\local\odoo-dev-docker-desktop - Check whether your dev containers are already running:
PS local\odoo-dev-docker-desktop> docker compose ps- The
docker composecommand and its YAML file are explained in Tutorial 03, section 3.2 —docker-compose.yml.
odooandpostgres) with stateUp. If the output is empty or showsExited, bring them up:PS local\odoo-dev-docker-desktop> docker compose up -dup— creates and starts all containers defined indocker-compose.yml.-d— detached mode: runs containers in the background so you get your terminal back instead of seeing live log output.
docker compose psagain to confirm both services areUp. - The
- Verify the Odoo web interface. Open
http://localhost:8067in your browser. You should see the Odoo login page (or the database manager if no database exists yet). If you cannot reach it, check the container logs:PS local\odoo-dev-docker-desktop> docker compose logs odoo --tail 30logs— prints stdout/stderr output from a container.odoo— the service name defined indocker-compose.ymlwhose logs you want to see.--tail 30— limits output to the last 30 lines (without it you get the entire log since the container started).
localhost).3.3) Create the Module Skeleton
The odoo scaffold command provides a quick way to create a module skeleton:
PS local\odoo-dev-docker-desktop> docker compose exec odoo odoo scaffold library /mnt/extra-addonspython odoo-bin scaffold library ~/work19/library. That syntax assumes Odoo is installed directly on the host with odoo-bin in the working directory and all Python dependencies in a local virtual environment. In your case the Odoo server process runs inside a Docker container, so you do not have odoo-bin on your host machine — docker compose exec is the equivalent way to reach it.The second argument is the destination directory, not the module folder itself — scaffold creates a library/ subfolder inside it automatically. The command produces no output on success. Verify the skeleton was created inside the container:
PS local\odoo-dev-docker-desktop> docker compose exec odoo ls /mnt/extra-addons/libraryYou should see files like __init__.py, __manifest__.py, controllers/, models/, etc.
These files exist both inside the container and on your Windows machine — they are not two separate copies. In docker-compose.yml the line ../../../custom-addons:/mnt/extra-addons:rw creates a volume mapping: the container path /mnt/extra-addons and the host path C:\dev\KomITi\komiti_library\custom-addons\ point to the same folder. The same principle applies on the EC2 production stack — there the files are physically on the Linux disk of the EC2 instance (e.g. /opt/odoo4komiti/custom-addons/), and Docker mounts that host directory into the container.
The full recommended structure for a production module in Odoo 19 is:
library/
├── __init__.py            # Python package marker (imports subpackages)
├── __manifest__.py        # module metadata: name, version, depends, data files
├── controllers/           # HTTP route handlers (web controllers)
│   ├── __init__.py
│   └── main.py
├── data/                  # initial data loaded on install
├── demo/                  # sample data loaded only in demo mode
│   └── demo.xml
├── i18n/                  # translation files (.pot / .po)
├── models/                # Python business logic and ORM model definitions
│   ├── __init__.py
│   └── library_book.py
├── reports/               # PDF report templates (QWeb)
├── security/              # access rights and record rules
│   ├── ir.model.access.csv
│   └── library_security.xml
├── static/                # web assets served to the browser
│   └── description/
│       └── icon.png
│   └── src/
│       ├── js/            # ES Module JavaScript files
│       ├── scss/          # SCSS stylesheets
│       ├── css/           # plain CSS (rarely used — prefer scss/)
│       └── xml/           # OWL component templates
├── tests/                 # automated test cases
│   ├── __init__.py
│   └── test_book.py
├── views/                 # XML definitions for UI: forms, lists, menus, actions
│   ├── book_view.xml
│   ├── book_list_template.xml
│   └── library_menu.xml
└── wizards/               # transient model (wizard) files
__manifest__.py and __init__.py. Following the convention makes your module easy for other developers to navigate.Minimal valid module
The absolute minimum needed for Odoo to find and install a module is just two files:
my_module/
├── __init__.py        ← can be completely empty
└── __manifest__.py    ← {"name": "My Module", "depends": ["base"]}
This installs silently, adds nothing, but proves the module directory is on the addons path and Odoo can load it. Everything else — models, views, security — is added incrementally.
3.4) The __init__.py Chain
Every directory in an Odoo module that contains Python code must have an __init__.py file. This is a standard Python requirement: it turns the directory into a Python package so that its files can be imported with the from . import syntax.
How the import chain works
When Odoo loads a module it executes its root __init__.py. That file must explicitly import every sub-package that contains Python code. The import chain for the library module looks like this:
# odoo/addons/ (Odoo server entry point)
#   └── loads library/__init__.py

# library/__init__.py
from . import models
from . import controllers   # only if controllers/ has Python files

# library/models/__init__.py
from . import library_book  # imports library/models/library_book.py

# library/controllers/__init__.py
from . import main          # imports library/controllers/main.py
models/library_member.py) but forgetting to add from . import library_member to models/__init__.py. The file exists on disk but Odoo never loads it — the model does not appear in the database and no error is shown.What each __init__.py contains
| File | Typical content | Notes |
|---|---|---|
library/__init__.py |
from . import models, controllers |
Root package — imports all sub-packages that have Python code |
library/models/__init__.py |
from . import library_book |
One line per model file. Add a line whenever you create a new model. |
library/controllers/__init__.py |
from . import main |
One line per controller file. |
library/tests/__init__.py |
from . import test_book |
One line per test file. Odoo's test runner discovers these automatically. |
views/, security/, demo/ — do not need an __init__.py. Those files are loaded by the manifest's data list, not by Python's import system.3.5) Creating the Manifest File
The manifest file (__manifest__.py) is the identity card of an Odoo module. It is a plain Python file that contains a single dictionary literal — no classes, no functions, just key-value pairs. When Odoo scans an addons directory it opens this file to decide what the module is called, which other modules it depends on, which data files it must load, and whether it should appear in the Apps list. Without a valid manifest Odoo will not recognise the directory as a module at all — the module simply does not exist from Odoo's point of view. You never import this file yourself; the Odoo server reads it automatically at startup and on every install or upgrade.
The complete manifest for v19:
{
    "name": "Library Management",
    "summary": "Manage library catalog and book lending.",
    "author": "Daniel Reis",
    "license": "AGPL-3",
    "website": "https://github.com/PacktPublishing",
    "version": "19.0.1.0.0",
    "category": "Services/Library",
    "depends": ["base", "website"],
    "application": True,
    "data": [
        "security/library_security.xml",
        "security/ir.model.access.csv",
        "views/book_view.xml",
        "views/library_menu.xml",
        "views/book_list_template.xml",
    ],
    "demo": [
        "demo/demo.xml",
    ],
    # NEW in v16: JS/CSS/SCSS assets declared here, not in XML templates
    "assets": {
        "web.assets_backend": [
            "library_app/static/src/js/*.js",
            "library_app/static/src/scss/*.scss",
            "library_app/static/src/xml/*.xml",
        ],
        "web.assets_frontend": [
            "library_app/static/src/css/website.css",
        ],
    },
    # NEW in v17: blocks install if Python packages are missing
    "external_dependencies": {
        "python": [],
    },
}
qweb manifest key is gone. In v15 you would write "qweb": ["static/src/xml/templates.xml"]. Do not use this key in v19. Move all QWeb/OWL template files into the assets dict under web.assets_backend.license key must be a recognised value. Use one of: LGPL-3, AGPL-3, OPL-1, OEEL-1. Unknown strings will raise an error during installation.external_dependencies—{"python": ["lxml"]}blocks install if the listed Python libraries are missing.pre_init_hook,post_init_hook,uninstall_hook— Python function names called during the module lifecycle.price,currency,live_test_url,images— Odoo Apps Store listing metadata.
3.6) Understanding depends
The depends list tells Odoo which other modules must be installed first. This has two practical consequences beyond mere load order:
- Install order guarantee. On a fresh database Odoo installs dependencies before the current module, so all their models, views, and security records exist by the time your module's data files are processed. If you omit a dependency, the install may succeed on your machine (where the dep is already installed) but fail on a clean server — a classic "works for me" bug.
- XML ID resolution. Your data files can only reference XML IDs from modules listed in
depends. For example,base.group_userin your ACL CSV is resolvable only becausebaseis independs. Referencing an ID from an unlisted module raises an error at install time. - Transitive dependencies. If module A depends on B, and B depends on C, then A's code can use models from C at runtime (while the server is executing requests). However, you should still list C explicitly in A's
dependsif you directly reference its records or models — relying on transitive loading is fragile when B later drops its dependency on C.
depends list. Add entries only when you get an "External ID not found" or "unknown model" error. Unnecessary dependencies slow down installation and bloat the module's footprint.3.7) Understanding data File Load Order
Files in the data list are loaded strictly top-to-bottom, one file at a time. A file can only reference records that were already created by a file earlier in the list (or by a dependency module). Getting this order wrong is one of the most common sources of install-time errors.
The most important rule is: security groups before ACL. Your ir.model.access.csv references group XML IDs like library.library_group_user. If the CSV is listed before the XML that defines those groups, Odoo raises "External ID not found" at install time. The correct order is always:
"data": [
    "security/library_security.xml",   # 1. define groups and record rules
    "security/ir.model.access.csv",    # 2. reference those groups
    "views/book_view.xml",              # 3. views reference models (already in DB after Python load)
    "views/library_menu.xml",          # 4. menus reference views
],
The same principle applies to any cross-file reference: a view that inherits another view must come after it; a record that sets a Many2one field pointing to another record must come after that record's file.
ir.model.access.csv first, before the security XML. The CSV tries to look up a group that does not exist yet and raises ValueError: External ID not found in the system: library.library_group_user."name" key is the display name shown in the Apps list and Settings. The technical name is always the directory name on disk. The technical name is what you use in the -i / -u CLI flags (-i library), in Python imports (from odoo.addons.library import ...), and as the prefix in XML IDs (library.library_group_user). These two names can differ — calling -i "Library Management" will fail; you must use the directory name library.3.8) Manifest Key Reference
| Key | Description | v19 Notes |
|---|---|---|
name | Module title. | Unchanged |
summary | One-line description. | Unchanged |
author | Copyright holders (comma-separated). | Unchanged |
license | Distribution license. | Must be a known identifier in v19 |
website | URL for docs or issues. | Unchanged |
version | Semantic version. Prefix with Odoo version: 19.0.1.0.0. | Prefix must match installed Odoo version |
category | Groups module in Settings and App Store. | Unchanged |
depends | Required addon modules. Must list all dependencies explicitly. | Unchanged |
application | True to show in Apps list. | Unchanged |
data | Data files (XML, CSV) loaded on install/upgrade. | Unchanged |
demo | Demo data files. | Unchanged |
installable | Default True. Set False to hide from Apps. | Unchanged |
auto_install | Auto-installs when all dependencies are present (glue modules). | Unchanged |
assets | JS/CSS/SCSS/OWL template assets. Dict of bundle name → file list. | New in v16 — replaces XML asset templates |
external_dependencies | Python package requirements. | New/enforced in v17+ |
qweb | Old QWeb template paths. | Removed in v16 — use assets |
3.9) Setting the Module Category
Categories help organise modules. The category name is set in the manifest and supports hierarchy, e.g. Services/Library. Odoo auto-generates the XML ID from the category path: for Services/Library the XML ID is base.module_category_services_library.
3.10) Choosing a License
- AGPL-3: Strong open source. Anyone offering the code as an online service must share their source.
- LGPL-3: More permissive. Allows commercial modifications without sharing source.
- OPL-1: Odoo's proprietary license. Used for commercial Odoo Apps Store modules.
3.11) Adding a Description and Icon
For apps (application: True), the description shown on the App Store comes from static/description/index.html — the description manifest key is ignored for apps. A module icon goes at static/description/icon.png.
3.12) Installing a Module
python odoo-bin -c ~/work19/library.conf -d library -i library
docker compose exec odoo odoo -d komiti_library_dev -i library --stop-after-init3.13) Upgrading Modules
| Change Type | Action Required |
|---|---|
| Adding or changing model fields | Upgrade (-u) |
| Changing Python logic / manifest | Server restart |
| Changing XML or CSV files | Upgrade (-u) |
| When in doubt | Restart AND upgrade |
python odoo-bin -c ~/work19/library.conf -d library -u library
docker compose exec odoo odoo -d komiti_library_dev -u library --stop-after-init. To restart after Python changes: docker compose restart odoo.The --dev=all option is available in all versions including v19 and automates this during development: XML/CSV changes are instantly reloaded; Python changes trigger an automatic server restart.
4) Step 2 Creating a New Application
An app is expected to include characteristic elements beyond a plain addon module:
- An icon, shown in the apps list
- A top-level menu item, under which all app menus are placed
- Security groups, so access can be enabled per user
4.1) Adding a Top Menu Item
Menu items are stored as ir.ui.menu database records, loaded from XML data files. A top-level menu is defined in views/library_menu.xml:
<odoo>
    <menuitem id="menu_library" name="Library" />
</odoo>
How Odoo knows this is a top-level menu — the parent attribute rule
The rule is simple: a <menuitem> with no parent attribute is automatically a top-level entry. Odoo places it directly in the main navigation bar. You do not need any special flag or setting — the absence of parent is the signal.
Every deeper level is created by pointing parent to the XML ID of the menu one level above it. The full three-level chain used in the Library module looks like this:
<!-- Level 1: top menu — no parent attribute -->
<menuitem id="menu_library"
          name="Library" />

<!-- Level 2: section heading — parent points to the top menu -->
<menuitem id="menu_library_catalog"
          name="Catalog"
          parent="menu_library" />

<!-- Level 3: leaf item — opens a view via the action attribute -->
<menuitem id="menu_library_books"
          name="Books"
          parent="menu_library_catalog"
          action="action_library_book" />
Odoo builds the full menu tree at runtime (each time the web client loads) by following these parent chains. A menu with no parent is the root; everything else is a descendant. There is no limit to nesting depth, but in practice three levels is the Odoo convention.
parent="library.menu_library" (with the module prefix) when the parent is defined in the same file. Within a single XML file you can reference local IDs without the module prefix. The module prefix (library.) is only needed when you reference an ID defined in a different file or module.Why are the menus split across multiple XML files?
The Library module defines its top menu in views/library_menu.xml and the child menus (+ their actions) inside views/book_view.xml. This split is a deliberate Odoo convention, not a technical requirement:
library_menu.xmlholds only the top-level shell — the entry in the navigation bar. This file is intentionally minimal. It can be loaded early, before any model-specific views exist.book_view.xmldefines the form/list/search views and the leaf menu items that open them. Theparentattribute referencesmenu_library(defined in the other file), which works because Odoo resolves XML IDs globally across all already-loaded data files.
The practical benefit: when you add a second model (e.g. library.member), you create a new views/member_view.xml that also sets parent="menu_library". The top menu file never needs to change. Each model's view file is self-contained and can be added or removed independently.
data list, library_menu.xml must come before book_view.xml, because the child menus in book_view.xml reference the parent ID defined in library_menu.xml. If the order is reversed Odoo raises "External ID not found: menu_library" at install time.A <menuitem> by itself does nothing when clicked — it is just a label in the navigation bar. The action attribute is what connects a leaf menu item to an actual view. It holds the XML ID of a window action (ir.actions.act_window record), which tells Odoo which model to open, in which view modes, and with what default domain or context.
Top menu vs leaf menu
Not every <menuitem> has an action. Only the leaf items (the ones that actually open something) carry the action attribute. Container items — the top menu and any intermediate section headings — have no action; they exist only to group and nest the leaves beneath them.
<menuitem id="menu_library_catalog" name="Catalog" parent="menu_library" /> ← no action — section heading
<menuitem id="menu_library_books" name="Books"
parent="menu_library_catalog"
action="action_library_book" /> ← has action — opens a view
What an ir.actions.act_window record looks like
The action record is defined in the same view XML file, usually placed just above the <menuitem> that references it:
<field name="name">Books</field>
<field name="res_model">library.book</field>
<field name="view_mode">list,form</field>
</record>
<menuitem id="menu_library_books" name="Books"
parent="menu_library_catalog"
action="action_library_book" />
Key fields of ir.actions.act_window
| Field | What it controls |
|---|---|
res_model | The technical name of the model to open (e.g. library.book). Required. |
view_mode | Comma-separated list of view types available: list,form, kanban,form, etc. The first one is the default. |
domain | Optional filter applied to every record load. E.g. [('active','=',True)]. |
context | Dict passed to the view. Can set default field values: {'default_state': 'draft'}. |
name | Label shown in the breadcrumb and window title bar. |
Why the action is defined separately from the menu
Actions are reusable. The same action_library_book can be referenced by multiple menu items, by a button on another form, or called programmatically. Keeping the action separate from the menu item lets you define what to open independently of where to navigate from.
Summary — what happens when a user clicks a leaf menu
│
▼
Odoo reads
action attribute → action_library_book│
▼
Loads
ir.actions.act_window record → res_model=library.book, view_mode=list,form│
▼
Renders the list view of
library.book (first mode in the list)│
▼
User can switch to form view by clicking a row
4.2) Adding Security Groups
Before features can be used by regular users, access must be granted through security groups. Security definitions are kept in security/library_security.xml.
Odoo is a multi-user business application. Every installation has users with different roles — accountants, salespeople, warehouse staff, managers, public website visitors. Without access control, any logged-in user could read, edit, or delete any data — including other companies' records, payroll data, or configuration tables.
Access security answers three questions:
- Who is allowed to use this feature at all?
- What operations can they perform (read / write / create / delete)?
- Which specific rows in the database can they see?
Odoo has one mechanism for each question.
Layer 1 — Security Groups (res.groups) → "Who?"
A group is a label attached to users. Groups control UI visibility: menu items, buttons, and fields can be made visible only to certain groups. If a user is not in the right group the menu simply does not appear — they do not even know the feature exists.
implied_ids is the inheritance mechanism. The library module defines three tiers:
▲
Library User ──implies──► library_group_user → same perms + record rule (active books only)
▲
Library Manager ──implies──► library_group_manager → full access, can delete
Note that library_group_user itself implies base.group_user, and library_group_manager implies library_group_user. This means a manager inherits all user rights automatically — you only define the extra rights at each level.
Layer 2 — Access Control Lists (ir.model.access) → "What operations?"
Even if a user can see a menu, Odoo will refuse the database operation unless an ACL entry explicitly grants it. The four permission columns are perm_read, perm_write, perm_create, perm_unlink.
The library module defines three ACL rows:
base.group_user— all internal users get read/write/create. This is the critical row: without it the top-level menu is hidden for everyone, including admin, because Odoo hides a menu if the user has noperm_readon the model.library_group_user— Library Users also get read/write/create (no delete). Same perms as base.group_user here, but this group is needed for the record rule to target.library_group_manager— Library Managers get full access includingperm_unlink=1(delete).
If you define ACL rows only for your custom groups and no user is yet assigned to them, the menu will be invisible to everyone — even to admin. Always include abase.group_userrow with at leastperm_read=1.
Layer 3 — Record Rules (ir.rule) → "Which rows?"
ACLs work at the table level — "you can read the library_book table". Record rules work at the row level — "you can only read rows where active = True".
The module defines one record rule targeting library_group_user:
- The rule applies to every user who is a member of
library_group_user— including viaimplied_ids. Becauselibrary_group_managerimplieslibrary_group_user, managers also get this rule and see only active books by default. - A plain internal user who has not been assigned to
library_group_user(only inbase.group_user) has no record rule applied — they can see all books including inactive ones.
If a user in library_group_user calls Book.search([]), Odoo silently rewrites it to Book.search([('active','=',True)]) before hitting the database. Inactive books are invisible — even through direct API calls.
Why noupdate="1" on Record Rules?
Record rules are often customised by a system administrator after installation (e.g., restrict users to their own branch's books). Without noupdate="1", every module upgrade would overwrite those customisations. With it, the rule is created once on first install and then left alone.
How the Three Layers Work Together
│
▼
1. Menu visibility check — base.group_user has perm_read=1 → menu shown ✓
│
▼
2. ir.model.access check — library_group_user has perm_read=1 → query allowed ✓
│
▼
3. ir.rule applied — book_user_rule: domain [('active','=',True)] appended
│
▼
Maria sees only active books. Inactive books invisible to her.
If Maria tries to delete → perm_unlink=0 for library_group_user → blocked at step 2.
A plain internal user (only base.group_user, not assigned to library_group_user) passes steps 1 and 2 but has no record rule applied at step 3 — they can see all books including inactive ones.
Why Not Just Use Admin for Everything?
The Administrator bypasses most security checks. Developers often test only as admin and then deploy — then real users get access errors on every page.
Always test your module logged in as a regular user belonging to the correct group, not as admin.
The test file reflects this: one test case explicitly calls unlink() as a plain user to verify they correctly cannot delete a book.
Summary — Three Layers at a Glance
| Mechanism | File | Controls | Applied when |
|---|---|---|---|
res.groups | library_security.xml | Who can see menus / buttons / fields | UI rendering |
ir.model.access | ir.model.access.csv | Which CRUD operations are allowed per group | Every ORM call |
ir.rule | library_security.xml | Which rows are visible (silently appended to every query) | Every ORM query |
ACL rows in this module:
| Group | Read | Write | Create | Delete | Record Rule |
|---|---|---|---|---|---|
base.group_user (all internal) | ✓ | ✓ | ✓ | ✗ | none — sees all books |
library_group_user | ✓ | ✓ | ✓ | ✗ | active=True filter applied |
library_group_manager | ✓ | ✓ | ✓ | ✓ | active=True filter (via implied user group) |
category_id, users on res.groups and groups_id on res.users in data XML. Do not set any of these in module data XML — all three raise ValueError: Invalid field '...' at install time. The category in Settings comes from the manifest's category key. User-to-group assignment must be done via Settings → Users after installation. The admin user has superuser bypass and does not need explicit group assignment.<odoo>
<data>
<!-- Library User Group -->
<record id="library_group_user" model="res.groups">
<field name="name">User</field>
<field name="implied_ids"
eval="[(4, ref('base.group_user'))]"/>
</record>
<!-- Library Manager Group -->
<record id="library_group_manager" model="res.groups">
<field name="name">Manager</field>
<field name="implied_ids"
eval="[(4, ref('library_group_user'))]"/>
</record>
</data>
</odoo>
This file defines two new rows in the res.groups database table — one for Library Users and one for Library Managers. Each <record> tag creates one group. The id attribute gives it an XML ID so other files can reference it. The name field is the display label visible in Settings → Users & Companies → Groups.
Understanding implied_ids and the eval syntax
implied_ids is the group inheritance field. Setting it on a group means: "anyone assigned to this group automatically also belongs to the listed groups". You never need to assign a user to both groups manually.
The value uses eval because it is Python code, not a plain string. The list [(4, ref('base.group_user'))] breaks down as:
4— ORM command meaning "add a link to an existing record" (without removing existing links).ref('base.group_user')— an XML helper that resolves the XML IDbase.group_userto its actual database integer ID at install time.
So the full line says: "link this group to the existing Internal User group".
The full inheritance chain
Because library_group_manager implies library_group_user, which in turn implies base.group_user, a single group assignment cascades all the way down:
│ automatically also member of
▼
library_group_user (Library User — can read/write/create, sees only active books)
│ automatically also member of
▼
base.group_user (Internal User — can log in to the backend)
You only define the extra permissions at each level. A Manager inherits everything a User can do, plus the ability to delete records.
Key fields for a group record:
- name: Group title (simple string).
- implied_ids: Groups whose privileges are inherited.
(4, ref('...'))adds a link to an existing record. - users (removed in v17): Do not use — raises
ValueError: Invalid field 'users' in 'res.groups'. Assign users via Settings UI after installation.
library_security.xml file must come before menu and view files in the manifest data list. Menus and views reference security groups, and those references must already be defined.5) Step 3 Adding Automated Tests
Programming best practices include having automated tests. This is especially important for Python, where there is no compilation step and syntax errors only surface at runtime (when the code actually executes). This chapter follows a test-driven development (TDD) approach: write tests first, confirm they fail, then develop the code to make them pass.
5.1) Requirements for Tests
- Tests go in a
tests/subdirectory. The test runner discovers this automatically. - Test files must be named starting with
test_and imported fromtests/__init__.py. Test classes derive fromTransactionCaseor another Odoo test base, imported fromodoo.tests.common. - Each test method must start with
test_. All changes made in aTransactionCasetest are rolled back after each test.
setUpClass(), the tests can run in any database, including empty databases or production database copies.5.2) Adding Test Cases
The test file defines four tests inside the TestBook class:
test_book_create— checks that a new book record hasactive = Trueby default.test_book_name_required— checks that creating a book without a name raises an error.test_check_isbn_valid— checks that_check_isbn()returnsTruefor a properly formatted ISBN.test_check_isbn_invalid— checks that_check_isbn()returnsFalsefor a malformed ISBN.
The tests/__init__.py imports the test module:
from . import test_book
The test file tests/test_book.py — updated for Odoo 19 best practices:
from odoo.tests.common import TransactionCase
from odoo.tests import tagged

@tagged('library', 'post_install', '-at_install')
class TestBook(TransactionCase):

    @classmethod
    def setUpClass(cls):
        super().setUpClass()
        cls.Book = cls.env["library.book"]
        cls.book1 = cls.Book.create({
            "name": "Odoo Development Essentials",
            "isbn": "879-1-78439-279-6"
        })

    def test_book_create(self):
        "New Books are active by default"
        self.assertEqual(self.book1.active, True)

    def test_book_name_required(self):
        "Creating a book without a name should raise an error"
        with self.assertRaises(Exception):
            self.Book.create({"name": False})

    def test_check_isbn_valid(self):
        "Check valid ISBN"
        self.assertTrue(self.book1._check_isbn())

    def test_check_isbn_invalid(self):
        "Check invalid ISBN"
        self.book1.isbn = "0000000000000"
        self.assertFalse(self.book1._check_isbn())
What this code does:
TransactionCase— the Odoo test base class. Every test method runs inside a database transaction that is automatically rolled back when the method finishes, so tests never leave data behind.@tagged(...)— marks which phase the test runs in.post_installmeans after the module is fully installed;-at_installmeans skip the install-time run. The custom tag'library'lets you run only these tests with--test-tags=library.setUpClass()— runs once before all test methods in the class. It creates one book record (Odoo Development Essentials) that all tests in this class can reuse viaself.book1.super().setUpClass()— must be called first insidesetUpClass. The Odoo framework initialisescls.env, the cursor, and the registry in this call. Omitting it causes the test environment to be uninitialised and the test will crash before reaching any assertion.cls.Book = cls.env["library.book"]— stores the model proxy in a class variable so every test method can access it viaself.Bookwithout repeatingself.env["library.book"].cls.envis used (notself.env) because this runs in a classmethod, whereselfdoes not exist.test_book_create— verifies that a newly created book hasactive = True(the default). If theactivefield default ever changes, this test will catch it.test_book_name_required— verifies that creating a book without a name raises an error, confirming therequired=Trueconstraint on the field. The failing case is: if you removedrequired=Truefrom thenamefield,Book.create({"name": False})would succeed silently, no exception would be raised inside thewithblock, andassertRaiseswould itself raiseAssertionError: Exception not raised— marking the test as failed.with self.assertRaises(Exception):— a context manager that passes the test only if the code inside the block raises the specified exception. If no exception is raised, or a different exception type is raised, the test fails. Using the broadExceptiontype here catches bothValidationErrorand ORM-level integrity errors.{"name": False}—Falseis used rather than""orNonebecause the Odoo ORM treatsFalseas the canonical empty value forCharfields. Passing an empty string may slip past some required-field checks in certain contexts;Falsereliably triggers the constraint.test_check_isbn_valid— calls the model's_check_isbn()validation method and asserts it returnsTruefor a valid ISBN string.test_check_isbn_invalid— directly assigns a 13-digit all-zero ISBN tobook1. The string has the correct length so the algorithm runs, but the computed check digit does not match the final0, causing_check_isbn()to returnFalse.
setUpClass() instead of setUp(). The setUp() method runs before every individual test method, which is slow for large test suites involving database writes. The setUpClass() classmethod runs once per class and is significantly faster. Note: use cls. (not self.) inside setUpClass.@tagged() decorator. Tags allow fine-grained test selection at runtime (when the test runner executes) with the --test-tags flag. The built-in tag post_install runs the tests after the module is installed. The -at_install prefix (minus sign) means "do not run during install" — only run in the post-install phase.5.3) Testing Access Security
By default, tests run with the internal __system__ user which bypasses access security. To test security properly, switch to a non-admin user in setUpClass():
@classmethod
def setUpClass(cls):
    super().setUpClass()
    user_demo = cls.env.ref("base.user_demo")
    cls.env = cls.env(user=user_demo)
    cls.Book = cls.env["library.book"]
5.4) Running Tests
# Run all tests for the module (v15 style — still works)
python odoo-bin -c ~/work19/library.conf -u library --test-enable

# Run only tests tagged 'library' (new in v17)
python odoo-bin -c ~/work19/library.conf -u library --test-enable --test-tags=library

# Run a specific test class
python odoo-bin -c ~/work19/library.conf -u library --test-enable --test-tags=library.TestBook

# Run a single test method
python odoo-bin -c ~/work19/library.conf -u library --test-enable --test-tags=library.TestBook.test_book_name_required
python odoo-bin -c ~/work19/library.conf with docker compose exec odoo odoo, use -d komiti_library_dev, and append --stop-after-init. Example:
docker compose exec odoo odoo -d komiti_library_dev -u library --test-enable --test-tags=library --stop-after-init
The --test-tags selector follows the pattern tag.ClassName.method_name. Each part is optional — you can stop at just the tag or the class. The example above runs only test_book_name_required inside TestBook, which is useful when debugging a failing constraint test without waiting for the full suite to complete.
6) Step 4 Implementing the Model Layer
Models describe and store business object data. A model describes a list of fields and can have specific business logic attached to it. Model classes derive from Odoo base classes; a model maps to a database table, and the Odoo ORM handles all database interactions automatically.
6.1) Creating a Data Model
Python files for models go inside a models/ subdirectory. The models/library_book.py file:
from odoo import api, fields, models

class Book(models.Model):
    _name = "library.book"
    _description = "Book"

    name = fields.Char("Title", required=True)
    isbn = fields.Char("ISBN")
    active = fields.Boolean("Active?", default=True)
    date_published = fields.Date()
    image = fields.Binary("Cover")
    publisher_id = fields.Many2one("res.partner", string="Publisher")
    author_ids = fields.Many2many("res.partner", string="Authors")

    # Automatically called to recompute the display name when name or isbn change.
    @api.depends("name", "isbn")
    def _compute_display_name(self):
        for book in self:
            book.display_name = (
                f"[{book.isbn}] {book.name}" if book.isbn else book.name
            )
_compute_display_name controls the label Odoo shows wherever it references a book — breadcrumbs, Many2one dropdowns, linked records. With this override a book with an ISBN appears as [879-1-78439-279-6] Odoo Development Essentials; without one it falls back to just the title.
Notice there is no display_name = fields.Char(...) declaration in the class. That field is already declared on every Odoo model by the base BaseModel class in the framework. You only override the compute method — adding the field declaration again would be redundant. This is specific to display_name and a few other built-in framework fields. For any field you invent yourself you always declare the field first.
Key model attributes:
- _name: Internal model identifier (dot notation → database table name with underscores).
- _description: Human-readable title for the model.
_name and the database table name: Odoo converts the dot to an underscore for the actual PostgreSQL table name: library.book → table library_book. The convention is always <module_name>.<object_name>. The same string is used everywhere you reference this model — in Many2one("library.book"), in the ACL CSV as model_library_book, and in record rules. Omitting _name entirely causes the class to be treated as an abstract mixin — no database table is created.What models.Model gives you
Writing class Book(models.Model) tells the Odoo framework to treat this class as a persistent data model. You write no SQL — Odoo handles everything automatically:
- Database table — On install/upgrade, Odoo reads all field definitions and creates or alters the PostgreSQL table to match. Adding a field to the class and running
-u libraryadds the column automatically. - ORM methods — Every model inherits
search(),create(),write(),unlink(),browse(), and many more. You can callself.env["library.book"].search([...])from anywhere in Odoo without writing a single SQL query. - Field change tracking — The ORM knows which fields changed and automatically triggers computed field recalculation, constraint checks, and onchange events.
- Automatic system fields — Odoo silently adds
id(primary key),create_date,write_date,create_uid, andwrite_uidto every model. You never need to declare them.
6.2) Field Types Reference
| Field Type | Description | v19 Notes |
|---|---|---|
Char | Short text strings | Unchanged |
Boolean | True/False values | Unchanged |
Date | Date values | Unchanged |
Binary | Binary data such as images | Unchanged |
Many2one | Many-to-one relation (foreign key) | Unchanged |
Many2many | Many-to-many relation (junction table) | Unchanged |
One2many | One-to-many relation (inverse of Many2one) | Unchanged |
Text | Multi-line text | Unchanged |
Html | Rich-text HTML content | Unchanged |
Integer | Integer numbers | Unchanged |
Float | Floating point numbers | Unchanged |
Monetary | Currency amounts | Unchanged |
Selection | Dropdown list of choices | Unchanged |
Json | Native JSON data (PostgreSQL jsonb) | New in v18 |
Many2one, Many2many, One2many) do not store a value directly — they store a reference (a foreign key) that points to a record in another table. For example, publisher_id = fields.Many2one("res.partner") stores the ID of a row in the res_partner table. res.partner is Odoo's built-in model for all contacts — companies, individuals, customers, and suppliers. By pointing publisher and authors to it, your module reuses the existing contact database instead of duplicating names and addresses.6.3) Common Field Attributes
Every field type accepts keyword arguments that control its behaviour. These are the most commonly used ones:
| Attribute | What it does | Example |
|---|---|---|
string | Label shown in the UI. If omitted, Odoo derives the label from the field name. | string="Title" |
required | Cannot be left empty. Enforced at ORM level — raises a validation error on save. | required=True |
default | Value set when a new record is created. Can be a fixed value or a callable. | default=True / default=lambda self: self.env.user |
readonly | Field is shown but cannot be edited in the UI. Does not prevent programmatic writes. | readonly=True |
help | Tooltip text shown when the user hovers over the field label in a form view. | help="International Standard Book Number" |
index | Creates a database index on the column, speeding up searches on this field. | index=True |
copy | Whether the value is copied when the record is duplicated. Default True for most fields, False for One2many. | copy=False |
tracking | Logs changes to this field in the chatter (requires mail.thread in depends). | tracking=True |
6.4) Custom Search Logic
When is it called? When the user types in the Books search bar without selecting a specific filter first. In that case Odoo searches by display_name and goes through this method. Without the override, typing an ISBN number in the general search bar would return no results. This override makes Odoo also check the isbn column so the book is found either way.
Note: when the user clicks a specific filter — e.g. Search by: ISBN — Odoo queries the isbn column directly and this method is not involved.
def _search_display_name(self, operator, value):
    # Only intercept text-based searches (ilike = contains, = exact match)
    if operator in ("ilike", "=") and value:
        # Search the isbn field with whatever the user typed
        isbn_matches = self.search([("isbn", operator, value)])
        if isbn_matches:
            # ISBN match found — return those records immediately
            return [("id", "in", isbn_matches.ids)]
    # No ISBN match — fall back to the default title search
    return super()._search_display_name(operator, value)
The method receives the operator (ilike for a contains-search, = for exact match) and the value the user typed. It first tries to match against isbn. If that finds something it returns those record IDs immediately — Odoo stops there and shows them in the results. If nothing matched by ISBN, super() runs the default logic which searches by title.
Practical result: Typing 879-1-784 in the search bar finds the book by ISBN; typing Odoo falls through to the title search.
6.5) Registering the Model File
The models/__init__.py must import the new file:
from . import library_book
And the top-level __init__.py must import models:
from . import models
7) Step 5 Setting Up Access Security
Before the Library app features can be used by regular users, access rules must be defined. Odoo uses Access Control Lists (ACLs) to grant permissions on models to security groups.
7.1) Adding Access Control Rules
ACL data is stored in the ir.model.access model. The most convenient way to provide it is through a CSV file: security/ir.model.access.csv:
id,name,model_id:id,group_id:id,perm_read,perm_write,perm_create,perm_unlink
access_book_internal,BookInternal,model_library_book,base.group_user,1,1,1,0
access_book_user,BookUser,model_library_book,library.library_group_user,1,1,1,0
access_book_manager,BookManager,model_library_book,library.library_group_manager,1,1,1,1
Field explanations:
- id: External/XML ID, unique within the module.
- name: Descriptive title, recommended to be unique.
- model_id: Auto-generated XML ID for the model. For
library.bookit ismodel_library_book. - group_id: The security group to grant permissions to. Must use the full
module.xml_idformat for groups defined in another module (e.g.base.group_user). For groups in the same module use the module prefix:library.library_group_user. - perm_read / perm_write / perm_create / perm_unlink:
1= allowed,0= denied.
The first line gives all internal users (base.group_user) read/write/create access — this ensures the menu and New button are visible without requiring manual group assignment after install. Library-specific groups add no extra permissions here but can be used for finer-grained record rules. Library managers get full access including delete.
base.group_user row with at least perm_read=1 so the menu appears for all internal users.7.2) Row-Level Access Rules (Record Rules)
Record Rules (ir.rule) provide row-level filtering — limiting which individual records a group can see. A record rule is placed inside a <data noupdate="1"> block so it is created on install but never overwritten on upgrades:
<data noupdate="1">
  <record id="book_user_rule" model="ir.rule">
    <field name="name">Library Book User Access</field>
    <field name="model_id" ref="model_library_book"/>
    <field name="domain_force">[('active', '=', True)]</field>
    <field name="groups" eval="[(4, ref('library_group_user'))]"/>
  </record>
</data>
The domain_force field uses Odoo's domain filter syntax. Here, library users can only see active books.
_check_company_auto = True and a company_id field to the model. Odoo will automatically generate the required record rules:
class Book(models.Model):
    _name = "library.book"
    _description = "Book"
    _check_company_auto = True     # auto-generates company record rules

    company_id = fields.Many2one(
        "res.company",
        default=lambda self: self.env.company
    )
7.3) Security Quick Reference
Internal System Models
| Model | Purpose | Key Fields |
|---|---|---|
res.groups | Security groups | name, implied_ids, users |
res.users | Users | name, groups_id |
ir.model.access | Access control (ACL) | name, model_id, group_id, perm_read, perm_write, perm_create, perm_unlink |
ir.rule | Record rules (row-level) | name, model_id, groups, domain_force |
ir.module.category | Module categories for groups | name, sequence |
Key XML IDs for Security Groups
| XML ID | Description |
|---|---|
base.group_user | Internal user — any backend user |
base.group_system | Settings — the Administrator belongs here |
base.group_no_one | Technical feature, hides items from users |
base.group_public | Public — anonymous website visitors |
Key XML IDs for Default Users
| XML ID | Description |
|---|---|
base.user_root | Root system superuser (OdooBot) |
base.user_admin | Default administrator |
base.default_user | Template for new backend users |
base.default_public_user | Template for new portal/public users |
8) Step 6 Implementing the Backend View Layer
The view layer describes the UI. Views are defined in XML, used by the web client to generate data-aware HTML. The three most commonly used view types are: List, Form, and Search.
8.1) Creating a Form View
A form view is the single-record editing screen — the page that opens when a user clicks on one row in a list. It displays all the fields of one record and lets the user read or edit them. Every field shown in the form is directly bound to a column in the database table: reading the form reads from the database, saving the form writes back to it. There is no intermediate mapping step — Odoo's ORM handles the translation automatically.
Views are data records stored in ir.ui.view. The file views/book_view.xml defines the form view using Odoo's business document style with <header> and <sheet> sections:
<odoo>
  <record id="view_form_book" model="ir.ui.view">
    <field name="name">Book Form</field>
    <field name="model">library.book</field>
    <field name="arch" type="xml">
      <form string="Book">
        <header>
          <!-- invisible attribute uses direct Python expression (v19) -->
          <button name="button_check_isbn" type="object"
                  string="Check ISBN"
                  invisible="not isbn"/>
        </header>
        <sheet>
          <group name="group_top">
            <group name="group_left">
              <field name="name"/>
              <field name="author_ids" widget="many2many_tags"/>
              <field name="publisher_id"/>
              <field name="date_published"/>
            </group>
            <group name="group_right">
              <!-- required attribute uses direct expression (v19) -->
              <field name="isbn" required="active"/>
              <field name="active"/>
              <field name="image" widget="image"/>
            </group>
          </group>
        </sheet>
      </form>
    </field>
  </record>
</odoo>
8.2) Form Structure — <header> and <sheet>
Every Odoo business document form is divided into two structural sections:
<header>— the top bar rendered with a grey background. It holds action buttons (like Check ISBN) and status bar widgets. It sits above the data area and is always visible when scrolling.<sheet>— the white content area below the header. All field inputs, groups, and notebooks go here. The name comes from the paper-sheet visual metaphor used in Odoo's UI.
Both are optional, but using them is the standard convention for any form that represents a business document (invoices, orders, records). Forms that are pure configuration dialogs sometimes omit them.
8.3) Two-Column Layout with Nested <group>
A single <group> inside a <sheet> renders all its fields as one column. To get the standard Odoo two-column layout, nest two <group> elements side by side inside a parent <group>:
<group name="group_top">          <!-- outer: splits into two columns -->
  <group name="group_left">        <!-- left column -->
    <field name="name"/>
    <field name="author_ids"/>
  </group>
  <group name="group_right">       <!-- right column -->
    <field name="isbn"/>
    <field name="active"/>
  </group>
</group>
The name attribute on a group is optional for rendering, but strongly recommended: it is the anchor point for other modules to inject fields into your form via view inheritance without breaking the layout.
8.4) Conditional Attributes — attrs Removed in v19
attrs dictionary conditionals. This is the most impactful view change. Every attrs="{'invisible': [...], 'readonly': [...], 'required': [...]}" must be rewritten using direct Python expression syntax.| Property | v15 syntax (removed) | v19 syntax (required) |
|---|---|---|
| Invisible | attrs="{'invisible': [('active','=',False)]}" |
invisible="not active" |
| Readonly | attrs="{'readonly': [('state','=','done')]}" |
readonly="state == 'done'" |
| Required | attrs="{'required': [('active','=',True)]}" |
required="active" |
| Multiple conditions | attrs="{'invisible': [('a','=',1),('b','=',2)]}" |
invisible="a == 1 and b == 2" |
| OR condition | attrs="{'invisible': ['|',('a','=',1),('b','=',2)]}" |
invisible="a == 1 or b == 2" |
8.5) Adding a List View
A list view is the multi-record overview screen — the table that appears when a user opens a menu item or navigates back from a form. Each row is one database record and each column maps directly to a field. The list view is always the first screen the user sees, which makes column selection important: show what helps the user identify and compare records at a glance, hide the rest behind optional.
<list> instead of <tree>. Also, the optional attribute lets users toggle column visibility.<record id="view_list_book" model="ir.ui.view">
<field name="name">Book List</field>
<field name="model">library.book</field>
<field name="arch" type="xml">
<list>
<field name="name"/>
<field name="author_ids" widget="many2many_tags" optional="show"/>
<field name="publisher_id" optional="show"/>
<field name="date_published" optional="hide"/>
<field name="isbn" optional="hide"/>
</list>
</field>
</record>
The optional="show" attribute makes the column visible by default but allows users to hide it. optional="hide" hides the column by default.
Default view: When a window action lists view_mode="list,form", Odoo opens the list view first because it appears first in the comma-separated value. If no explicit view record exists for a model, Odoo generates a minimal default one automatically — every field in declaration order, no optional, no widgets. Defining your own view record overrides this default completely for that view type.
8.6) Adding a Search View
A search view is the invisible third view type — it has no rows, no columns, and never displays records directly. Instead it controls the search bar at the top of the list view: which fields the user can search by, which quick-filter buttons are available, and which Group By options appear. Every list or kanban view silently pairs with a search view in the background.
What makes the search view unique is that it operates entirely on the query, not the result. A <field> element adds a searchable field to the dropdown. A <filter> with a domain pre-applies a WHERE clause. A <filter> with a context={'group_by': ...} groups the result set. None of these affect the record data — they only change what the ORM fetches. If no search view is defined for a model, Odoo generates a minimal default that searches only the name field.
Search views define which fields are searched when the user types, and provide predefined filter options:
<record id="view_search_book" model="ir.ui.view">
  <field name="name">Book Filters</field>
  <field name="model">library.book</field>
  <field name="arch" type="xml">
    <search>
      <field name="name"/>
      <field name="isbn"/>
      <field name="publisher_id"/>
      <filter name="filter_active" string="Active"
              domain="[('active','=',True)]"/>
      <filter name="filter_inactive" string="Inactive"
              domain="[('active','=',False)]"
              context="{'active_test': False}"/>
      <separator/>
      <filter name="group_publisher" string="Publisher"
              context="{'group_by': 'publisher_id'}"/>
    </search>
  </field>
</record>
Every <filter> element must have a unique name attribute — this has been required since Odoo 12 and remains true in v19.
domain is a list of conditions written as Python-style tuples: [('field', 'operator', value)]. Each tuple is (field_name, comparison_operator, value). Multiple conditions are ANDed by default. Common operators: =, !=, >, <, >=, <=, in, not in, like, ilike (case-insensitive contains). Use a prefix '|' before two conditions for OR, or '&' for explicit AND: ['|', ('active','=',True), ('isbn','!=',False)]. An empty list [] means no restriction — all records match.<group> wrapper inside <search> In Odoo 15/16 you would wrap Group By filters in <group expand="0" string="Group By">. This wrapper was removed in Odoo 17 — it raises Invalid view definition at install. The UI now automatically separates Filter and Group By items based on whether the filter uses domain or context={'group_by': ...}. Use <separator/> to add a visual divider between sections.active field have an implicit active=True filter applied by the ORM on every query. Without context="{'active_test': False}" on the Inactive filter, the filter appears to do nothing — the ORM overrides the domain before it reaches the database.8.7) The context Attribute on Filters
Filters can do one of two things: restrict the records shown (domain), or change how the ORM queries and displays data (context). The context attribute injects key-value pairs into the query context when the filter is active:
| Context key | Effect |
|---|---|
{'group_by': 'publisher_id'} |
Groups results by the given field — turns the filter into a Group By option in the search dropdown |
{'active_test': False} |
Disables the ORM's implicit active=True filter so archived records are included in results |
{'default_publisher_id': 1} |
Pre-fills the publisher_id field when creating a new record from this filtered view |
A filter can have both domain and context at the same time. Odoo's UI automatically places filters that use only context={'group_by': ...} in the "Group By" section of the search dropdown — no extra markup needed.
8.8) How <field> Behaves Differently in a Search View
A <field> element means something completely different depending on which view type it appears in:
| View type | What <field name="name"/> does |
|---|---|
| Form view | Renders an editable input widget for that field on the screen |
| List view | Renders a column in the table for that field |
| Search view | Adds a "Search by Title" option in the search bar dropdown — no input is shown until the user selects it. When selected, the typed text is applied as a filter on that field. |
In a search view, omitting a field doesn't hide it — it just means the user cannot search by that field from the dropdown. The list of <field> elements in a search view defines the searchable fields menu, not the visible columns.
8.9) Adding Menu Items and Window Actions
At this point the library module already has the top-level "Library" entry in the navigation bar — that was defined in section 4 as a bare <menuitem id="menu_library" name="Library"/> with no parent attribute. What is missing is the child item that actually opens the book records. The menu hierarchy for the library module is:
<!-- Level 1 — already created in section 4 -->
Library   (menu_library)
  └── <!-- Level 2 — added here -->
      Books   (menu_library_book)  →  opens the Book list/form
ir.actions.act_window) are the most frequent — they present views in the web client. Report actions (ir.actions.report) run PDF/HTML reports. Server actions (ir.actions.server) define automated tasks such as sending e-mails or executing Python code. In this tutorial we focus on window actions because they are what you need to connect a menu item to a view.
A leaf menu item cannot open a view on its own — it must point to a window action (ir.actions.act_window) that tells Odoo which model to open and in which view modes. The action is defined first, then the menu item references it via the action attribute. Edit views/library_menu.xml:
<!-- Action to open the Book list -->
<record id="action_library_book" model="ir.actions.act_window">
  <field name="name">Library Books</field>
  <field name="res_model">library.book</field>
  <field name="view_mode">list,form</field>
</record>

<!-- Menu item to open the Book list -->
<menuitem id="menu_library_book"
  name="Books"
  parent="menu_library"
  action="action_library_book"
/>
Each field in the window action record has a specific purpose:
| Field | Value | Meaning |
|---|---|---|
name |
Library Books |
The label shown in the breadcrumb bar when the view is open |
res_model |
library.book |
The model whose records this action opens — must match _name on the Python class |
view_mode |
list,form |
Comma-separated list of allowed view types in display order. The first entry is the one opened initially. Switching between them uses the view-type icons in the top-right corner. |
view_mode="list,form" instead of tree,form. The tree keyword still works for backward compatibility but list is the current standard name.res_model vs model: The window action uses <field name="res_model"> while view records use <field name="model">. Both point to the same thing — the technical name of the model — but each record type uses its own field name. res_model is the field on ir.actions.act_window; model is the field on ir.ui.view.8.10) Button Styling
class="oe_highlight" CSS class for primary buttons is replaced by Bootstrap-compatible class="btn-primary":<button name="button_check_isbn" type="object"
string="Check ISBN"
class="btn-primary"
invisible="not isbn"/>
type values: The type attribute controls what name refers to. Use type="object" to call a Python method on the model (most common). Use type="action" to trigger a window or client action by its XML ID. Use type="url" to open an external URL in the browser. Using the wrong type is a common mistake — if a button does nothing when clicked, check type first.9) Step 7 Implementing the Business Logic Layer
The business logic layer supports business rules such as validations and automation. Python methods added to the model class implement this behavior.
9.1) Adding Business Logic — ISBN Validation
Modern ISBNs have 13 digits; the last is a check digit computed from the first 12. The _check_isbn() method on the Book class validates this:
def _check_isbn(self):
    self.ensure_one()
    digits = [int(x) for x in self.isbn if x.isdigit()]
    if len(digits) == 13:
        ponderations = [1, 3] * 6
        terms = [a * b for a, b in zip(digits[:12], ponderations)]
        remain = sum(terms) % 10
        check = 10 - remain if remain != 0 else 0
        return digits[-1] == check
    return False
Line by line:
self.ensure_one()— Guards against accidental multi-record calls. Raises aValueErrorimmediately ifselfcontains zero or more than one record, instead of silently computing a wrong result.digits = [int(x) for x in self.isbn if x.isdigit()]— Strips hyphens, spaces, or other formatting characters from the raw ISBN string and converts each remaining digit character to an integer. Result: a plain list of integers, e.g.[9, 7, 8, 0, 2, 0, 1, 5, 3, 0, 6, 3, 6].if len(digits) == 13— The method only validates ISBN-13. If fewer or more digits are found it returnsNone(implicitly falsy), so the caller treats a short or garbled value as invalid.ponderations = [1, 3] * 6— The ISBN-13 standard assigns alternating weights 1 and 3 to the first 12 positions.[1, 3] * 6is a concise way to produce[1, 3, 1, 3, 1, 3, 1, 3, 1, 3, 1, 3].terms = [a * b for a, b in zip(digits[:12], ponderations)]— Multiplies each of the first 12 digits by its corresponding weight, producing a list of 12 products.remain = sum(terms) % 10— Sums all weighted products and takes the remainder when divided by 10.check = 10 - remain if remain != 0 else 0— Computes the expected check digit. If the remainder is 0 the check digit is 0; otherwise it is10 − remainder.return digits[-1] == check— Compares the actual 13th digit against the computed check digit. ReturnsTrueif valid,Falseif not.
9.2) Connecting Logic to a Form Button
The Check ISBN button defined in the form view (see section 8 — Creating a Form View) uses type="object" and name="button_check_isbn". When the user clicks it, Odoo calls the Python method with that exact name on the current record. The method's job is to be the user-facing entry point: it iterates over the recordset, delegates the actual math to _check_isbn(), and raises a ValidationError with a human-readable message if something is wrong. Unlike the constraint, this method runs only on demand — it gives the user immediate feedback while they are still editing, before a save occurs.
from odoo.exceptions import ValidationError

def button_check_isbn(self):
    for book in self:
        if not book.isbn:
            raise ValidationError(
                f"Please provide an ISBN for {book.name}")
        if not book._check_isbn():
            raise ValidationError(
                f"{book.isbn} is not a valid ISBN-13")
    return True
Key points:
selfin Odoo methods is a recordset. Using aforloop handles both single and multi-record cases.- Always
return Truefrom button methods. Some XML-RPC client implementations don't supportNone/Nullreturn values. ValidationErroris imported fromodoo.exceptions.
9.3) Why Three Methods for One Rule?
The ISBN validation is split across three methods on purpose — each one has a different trigger and a different role:
| Method | Triggered by | Returns |
|---|---|---|
_check_isbn() |
Other methods — not called directly by Odoo | True / False (pure computation) |
button_check_isbn() |
User clicking the button on the form | True, or raises ValidationError |
_check_isbn_constraint() |
Odoo automatically on every create / write |
None, or raises ValidationError |
This separation keeps each method focused: _check_isbn() is a reusable helper that knows only the math; the button and the constraint each call it and decide what to do with the result.
9.4) Constraints (@api.constrains)
Model-level constraints using the @api.constrains decorator are unchanged in v19:
@api.constrains("isbn")
def _check_isbn_constraint(self):
    for book in self:
        if book.isbn and not book._check_isbn():
            raise ValidationError(
                f"The ISBN {book.isbn} is not valid."
            )
Constraints run automatically on every save (both create and write). The button, by contrast, only runs when the user explicitly clicks it. That is why both exist: the constraint prevents invalid data from ever entering the database, while the button gives immediate on-demand feedback while the user is still filling in the form.
api decorators tell the framework when to call a method automatically and how to treat self inside it — you write the logic once and the decorator decides the trigger. For example, a method decorated with @api.constrains('isbn') will be called automatically every time a record is saved and the isbn field was part of the write; a method decorated with @api.depends('name', 'isbn') will be scheduled for recomputation every time either of those fields changes.
| Decorator | When it fires | Typical use |
|---|---|---|
@api.constrains('field') | Every create and write that touches the listed fields | Validate field values; raise ValidationError on bad data |
@api.depends('field') | When any of the listed fields change | Mark a computed field for recomputation |
@api.onchange('field') | When the user edits the field in a form (client-side, before save) | Update related fields live in the UI; show warnings |
@api.model | Not record-specific — self is the model class, not a recordset | Override create(), implement class-level helpers |
10) Step 8 Implementing the Website UI
Odoo provides a web development framework for building website features closely integrated with backend apps. This step creates a web page displaying a list of active books at the /library/books URL.
10.1) Web Controllers
Web controllers are Python methods in an http.Controller-derived class, bound to URL endpoints using the @http.route decorator.
Why not use the backend list view?
The library module already has a list view defined in section 8 — so why does section 10 need a controller and a separate template for the same data? Because they are two completely different rendering systems that serve different audiences:
| Backend views (section 8) | Web controller + QWeb (section 10) | |
|---|---|---|
| Rendered by | Odoo JavaScript client running in the browser | Python on the server — returns plain HTML |
| Requires login | Yes — user must be authenticated | No — works with auth='public' |
| URL pattern | /odoo/... backend routes | Any URL you define in @http.route |
| Typical audience | Internal staff using the backend | Public website visitors |
When a browser requests /library/books, Odoo's web server looks up the registered route, calls the controller method, which queries the database, passes the data to a QWeb template, and returns the rendered HTML page. The backend list view is never involved — it only works inside the Odoo JS app shell, typically at /odoo/library-books, and requires a logged-in session. Both can coexist for the same model: an admin uses the backend list view; a public visitor uses the website page at /library/books.
How a controller works
Think of a controller as the bridge between a browser request and the database. When a visitor opens /library/books in their browser, Odoo's web server receives the HTTP request, looks up which method is registered for that URL, calls it, and sends the returned HTML page back to the browser. The controller method is where you query the database, prepare data, and choose which template to render — exactly the same job a view function does in Flask or Django.
First, add controllers to the top-level imports in library/__init__.py:
from . import models
from . import controllers
Then create controllers/__init__.py:
from . import main
The controller in controllers/main.py:
from odoo import http

class Books(http.Controller):

    @http.route("/library/books", auth="public", website=True)
    def list(self, **kwargs):
        Book = http.request.env["library.book"]
        books = Book.sudo().search([])
        return http.request.render(
            "library.book_list_template",
            {"books": books}
        )

    @http.route("/library/book/<int:book_id>", auth="public", website=True)
    def detail(self, book_id, **kwargs):
        book = http.request.env["library.book"].sudo().browse(book_id)
        if not book.exists() or not book.active:
            return http.request.not_found()
        return http.request.render(
            "library.book_detail_template",
            {"book": book}
        )
The Books controller registers two publicly accessible routes:
/library/books— the list page: fetches all active book records and renders them as an HTML page using thebook_list_templateQWeb template./library/book/<int:book_id>— the detail page: fetches a single book by its database ID extracted from the URL and renders it withbook_detail_template. Returns a 404 if the book does not exist or is archived.
Both routes use auth="public", making them accessible without login — intentional for a public catalogue.
class Books(http.Controller)— Declares a controller class. Odoo discovers it automatically at startup by scanning all imported modules forhttp.Controllersubclasses. The class name is arbitrary.@http.route("/library/books", auth="public", website=True)— Registers the URL/library/books. The decorator is what makes the following method a route handler — without it the method is just a plain Python function that Odoo never calls from the web.http.request.env["library.book"]— Gets thelibrary.bookmodel from the current request's ORM environment. This is the sameenvobject used in backend model methods, just accessed viahttp.requestinstead ofself.env.Book.sudo().search([])—sudo()elevates the query to superuser rights, bypassing the public user's access restrictions.search([])with an empty domain returns all active records.http.request.render("library.book_list_template", {"books": books})— Renders the QWeb template identified by the XML IDlibrary.book_list_templateand passes thebooksrecordset to it as a template variable. Returns an HTTP response with the rendered HTML./library/book/<int:book_id>— The<int:book_id>part is a URL parameter. Odoo extracts the integer from the URL and passes it as thebook_idargument to the method. Visiting/library/book/42callsdetail(book_id=42).http.request.not_found()— Returns an HTTP 404 response if the book does not exist or is archived.
Both routes explicitly pass auth="public" — this is required since v16. The auth parameter is the key decision point for every route you write, because it controls who can reach the URL and whether the ORM environment carries identity:
auth parameter. In v15, omitting auth used permissive defaults. In v16+ this is enforced. Use auth='public' for pages accessible without login, auth='user' for pages that require a logged-in user.| Parameter | Description |
|---|---|
auth='public' | Accessible to anyone (logged in or anonymous). The ORM environment runs as the built-in public user who has no access rights by default — always use .sudo() for ORM calls. |
auth='user' | Requires login. Redirects to /web/login if not authenticated. The ORM env carries the logged-in user's identity and access rights, so no .sudo() bypass is normally needed. The route still renders a website QWeb template — not a backend form or list view. Backend views are a separate system that only activates through the Odoo JSON-RPC interface (/web#action=…), not through HTTP route controllers. |
auth='none' | No authentication check. Use only for completely open endpoints. |
website=True | Wraps the response in the website layout (header, footer, theme). |
10.2) Adding a QWeb Template
QWeb is Odoo's XML-based templating engine for rendering HTML pages. Unlike Jinja2 or Django templates that use {{ variable }} syntax, QWeb embeds logic through XML attributes — t-foreach, t-if, t-out — on standard HTML tags, keeping templates valid HTML throughout.
Add views/book_list_template.xml:
<odoo>
  <template id="book_list_template" name="Book List">
    <t t-call="website.layout">
    <div id="wrap" class="container mt-4">
      <h1 class="mb-4">Library Books</h1>
      <t t-if="not books">
        <p class="text-muted">No books are currently available.</p>
      </t>
      <t t-foreach="books" t-as="book">
        <div class="row border-bottom py-2">
          <div class="col-md-5"><strong><span t-field="book.name"/></strong></div>
          <div class="col-md-3"><span t-field="book.publisher_id"/></div>
          <div class="col-md-2"><span t-field="book.date_published"/></div>
          <div class="col-md-2"><span t-out="book.isbn or ''"/></div>
        </div>
      </t>
    </div>
    </t>
  </template>
</odoo>
<template> vs <record model="ir.ui.view">: In section 8, backend views were declared with the verbose <record model="ir.ui.view"> syntax. Website QWeb templates use the shorthand <template> element — Odoo expands it into the same ir.ui.view record automatically. The id attribute becomes the XML ID passed to http.request.render() as "module_name.template_id".t-esc and t-raw. These attributes are completely removed. Replace t-esc with t-out. Replace t-raw with t-out plus a widget option.| v15 attribute | v19 replacement | Notes |
|---|---|---|
t-esc="value" |
t-out="value" |
t-out auto-escapes HTML — same safety as t-esc |
t-raw="value" |
t-out="value" t-options="{'widget': 'html'}" |
Use the html widget to render unescaped HTML content |
t-field="record.field" |
t-field="record.field" |
Unchanged — still the preferred way to render Odoo record fields |
t-field for Odoo record fields (handles formatting, widgets, localization). Use t-out for Python expressions. Never use t-esc or t-raw.t-foreach="books" t-as="book"— Loops over thebooksvariable passed in from the controller'srender()call.t-assets the name of the loop variable (book) used inside the loop body.id="wrap"— The outer div ID that the Odoo website layout looks for when injecting the header, footer, and theme wrapper. Without it,website=Trueroutes still work but the page may not integrate cleanly with the site layout.t-field="book.name"— Renders an Odoo record field with proper formatting, localization, and widget support (e.g. currency symbols, date formats, many2one display names). Prefert-fieldovert-outwhenever you are rendering a field directly from an Odoo record.t-out="book.isbn or 'N/A'"— Evaluates the Python expression and outputs the result as HTML-escaped text. Theor 'N/A'fallback is plain Python: ifbook.isbnis falsy (empty string orFalse) the literal'N/A'is shown instead. Uset-outfor Python expressions that are not direct field references.
The detail template — views/book_detail_template.xml
The controller's detail route extracts book_id from the URL (/library/book/<int:book_id>), fetches the matching record, and then calls http.request.render("library.book_detail_template", {"book": book}) — this is the template it expects. Create views/book_detail_template.xml:
<odoo>
  <template id="book_detail_template" name="Book Detail">
    <t t-call="website.layout">
    <div id="wrap" class="container">
      <h1 t-field="book.name"/>
      <dl>
        <dt>ISBN</dt>       <dd><span t-out="book.isbn or 'N/A'"/></dd>
        <dt>Published</dt> <dd><span t-field="book.date_published"/></dd>
        <dt>Publisher</dt> <dd><span t-field="book.publisher_id"/></dd>
      </dl>
      <a href="/library/books">Back to list</a>
    </div>
    </t>
  </template>
</odoo>
website.layout? It is a QWeb template defined by the website module that wraps your content in the full site chrome — the navigation bar, footer, SEO meta tags, and any theme styles. Calling it with <t t-call="website.layout"> is the equivalent of a Django {% extends "base.html" %}: everything inside the <t> tag becomes the page body, and website.layout injects the surrounding structure. Without this call the route still works but returns a bare HTML fragment with no header or footer.Once both templates are written, register them in the manifest so Odoo loads them at startup — also ensure website is listed in depends:
"depends": ["base", "website"],
"data": [
    "security/library_security.xml",
    "security/ir.model.access.csv",
    "views/book_view.xml",
    "views/library_menu.xml",
    "views/book_list_template.xml",
    "views/book_detail_template.xml",
],
10.3) JavaScript Frontend — OWL Components
static/ directory and no JavaScript files. The example below shows how you would add a live ISBN field widget if you wanted to extend the module — it is illustrative, not part of the running codebase.A useful extension would be a custom OWL field widget for the ISBN field. The constraint added in section 9 validates the ISBN on save — but it only fires when the user clicks Save. A custom field widget adds live feedback inside the form field as the user types: it shows a green checkmark while the ISBN is valid and a red indicator while it is not, before any save happens. This is purely a UI enhancement; the server-side constraint remains the authoritative check.
Create static/src/js/isbn_widget.js:
// library/static/src/js/isbn_widget.js
import { Component, useState } from "@odoo/owl";
import { registry }            from "@web/core/registry";
import { standardFieldProps }  from "@web/views/fields/standard_field_props";

class IsbnWidget extends Component {
    static template = "library.IsbnWidget";
    static props    = { ...standardFieldProps };

    setup() {
        this.state = useState({ value: this.props.value || "" });
    }

    get isValid() {
        const v = this.state.value.replace(/-/g, "");
        return v.length === 13 && /^\d+$/.test(v);
    }

    onInput(ev) {
        this.state.value = ev.target.value;
        this.props.update(ev.target.value);
    }
}

registry.category("fields").add("isbn_widget", { component: IsbnWidget });
import { Component, useState } from "@odoo/owl"—Componentis the OWL base class (equivalent toReact.Component).useStateis OWL's reactive state hook: any change to auseStateobject automatically re-renders the template.import { registry } from "@web/core/registry"— The global Odoo registry. It maps string keys to implementations for fields, services, actions, and more. Registering here is the JavaScript equivalent of adding a record toir.ui.view— it makes the widget known to the framework.import { standardFieldProps } from "@web/views/fields/standard_field_props"— A pre-defined set of props that all field widgets receive from the form view:value,update,readonly,required, etc. Spreading them intostatic propstells OWL to accept and validate all of them.static template = "library.IsbnWidget"— The XML ID of the OWL template that renders this component's HTML. Format ismodule_name.TemplateName. The template lives in a separate XML file (see below).static props = { ...standardFieldProps }— Declares the component's prop contract. OWL validates props at runtime (in the browser, while the component renders) in dev mode; missing or wrong-typed props raise a warning.get isValid()— A JavaScript getter that strips hyphens from the current value and checks if the result is exactly 13 digits. Same logic as the Python constraint in section 9, mirrored in the browser for live feedback.this.props.update(ev.target.value)— The form view passes anupdatecallback as a prop. Calling it notifies the form that the field value has changed, keeping the ORM environment in sync with what the user typed.registry.category("fields").add("isbn_widget", { component: IsbnWidget })— Registers the widget under the key"isbn_widget". This name is used in the form view XML aswidget="isbn_widget"to attach the component to a specific field.
Every OWL component needs a companion XML template. Create static/src/xml/isbn_widget.xml:
<?xml version="1.0" encoding="utf-8"?>
<templates>
<t t-name="library.IsbnWidget" owl="1">
<div class="o_field_widget d-flex align-items-center">
<input t-att-value="state.value" t-on-input="onInput" class="o_input"/>
<span t-if="isValid" class="text-success ms-2">✓ Valid</span>
<span t-elif="state.value" class="text-danger ms-2">✗ Invalid</span>
</div>
</t>
</templates>
static/src/xml/ and use <templates> as the root element with owl="1" on each t-name. Odoo view XML (forms, lists, searches) uses <odoo> as root and is loaded server-side. OWL templates are loaded client-side as JavaScript assets.To use the widget, add widget="isbn_widget" to the ISBN field in the form view XML (views/book_view.xml):
<field name="isbn" widget="isbn_widget"/>
The form view renderer looks up "isbn_widget" in registry.category("fields") at render time and mounts the OWL component in place of the default text input.
Both files must be declared in the manifest assets key — not in the data key, which is for XML view records only:
"assets": {
    "web.assets_backend": [
        "library/static/src/js/isbn_widget.js",
        "library/static/src/xml/isbn_widget.xml",
    ],
},
11) Exercise — Add a "Number of Pages" Field
Practice everything covered in this chapter by extending the module yourself. The goal is to add a Number of pages field to the library.book model and wire it through every layer: model, view, website template, and a basic validation rule.
Tasks
-
Model layer — Add an
Integerfieldnum_pagestomodels/library_book.py.
Hint:fields.Integer(string="Number of Pages", default=0) -
Form view — Add the field to
views/book_view.xmlinside the existing<group>that containsdate_published. -
List view — Add
num_pagesas an optional column in the list view (<field name="num_pages" optional="show"/>). -
Business logic — Add an
@api.constrainsmethod that raises aValidationErrorifnum_pagesis negative. -
Website template — Add a row for pages to
views/book_detail_template.xml. -
Test — Add a test case in
tests/test_book.pythat verifies saving a book withnum_pages=-1raisesValidationError.
Solution
1. Model field — models/library_book.py
num_pages = fields.Integer(string="Number of Pages", default=0)
2 & 3. Form and list view — views/book_view.xml
<!-- inside the group that has date_published -->
<field name="num_pages"/>

<!-- inside the list view -->
<field name="num_pages" optional="show"/>
4. Constraint — models/library_book.py
@api.constrains("num_pages")
def _check_num_pages(self):
    for book in self:
        if book.num_pages < 0:
            raise ValidationError("Number of pages cannot be negative.")
Ensure ValidationError is imported: from odoo.exceptions import ValidationError
5. Website detail template — views/book_detail_template.xml
<dt>Pages</dt>
<dd><span t-out="book.num_pages or 'Unknown'"/></dd>
6. Test — tests/test_book.py
def test_negative_pages(self):
    with self.assertRaises(ValidationError):
        self.env["library.book"].create({
            "name": "Bad Book",
            "num_pages": -1,
        })
12) Summary
What We Built — Updated for Odoo 19
A Library book catalog application from scratch, covering all essential components of an Odoo module in v19.
- Models — Python classes with
_compute_display_name()(notname_get()) and@api.model_create_multiforcreate(). - Manifest —
assetsdict replaces XML asset templates;qwebkey removed;external_dependenciesvalidated. - Access security — ACL rules and record rules; explicit
ir.module.categoryrecords recommended. - Menus and actions — XML records linking navigation to views.
view_mode="list,form". - Views —
<list>replaces<tree>;attrsremoved — use direct expressions (invisible="not active"). - Business logic — Model methods enforcing domain rules.
self.env.companyfor current company. - Web UI — Controllers with explicit
auth='public'; QWeb templates uset-out/t-field(nott-esc). - Tests —
setUpClass()+@tagged()for efficient, filterable test suites.
5 Most Critical v15 → v19 Breaking Changes
| # | What | v15 | v19 |
|---|---|---|---|
| 1 | View conditionals | attrs="{'invisible': [...]}" |
invisible="expression" |
| 2 | Display name | def name_get(self) |
def _compute_display_name(self) |
| 3 | Template output | t-esc="..." |
t-out="..." |
| 4 | Record creation | @api.model def create(self, vals) |
@api.model_create_multi def create(self, vals_list) |
| 5 | Frontend assets | XML template inheritance | assets key in manifest + OWL ES Modules |
Module Upgrade / Restart Rules — Always Remember
| Change Type | Action Required |
|---|---|
| Adding / changing model fields | Upgrade (-u module_name) |
| Changing Python logic (including manifest) | Server restart |
| Changing XML or CSV files | Upgrade (-u module_name) |
| When in doubt | Restart AND upgrade |
The Library application built in this chapter is used as the base for all subsequent chapters, where each iteration adds another layer of features through extension and inheritance.